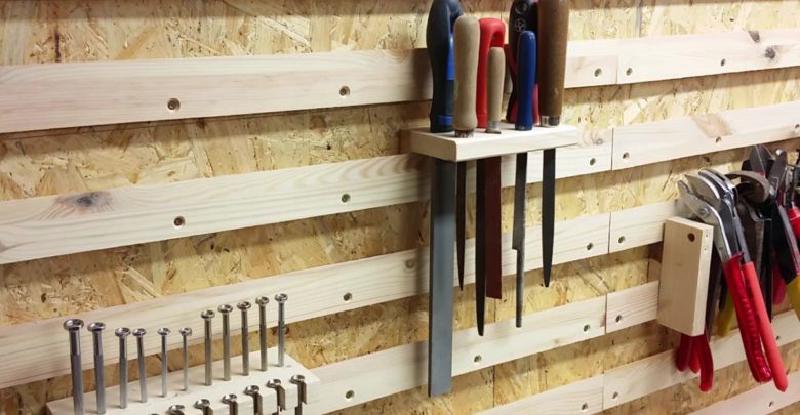
My first contribution will be the realization of a “French Cleat” system, which has found its place in our storage room.
Since this is quite small and you can really only turn around your own axis, I did not want to mount any fixed shelves.
It should be flexibel - thus adaptable to the respective situation - but if possible use the space well.
Since I already knew the French cleat system, the idea ripened in me: That should be …
Since this was my first project and I had the idea for this kind of documentation later, the making is not documented. Only the result I can show here. :(
What is French Cleat?
French Cleat is actually a very simple construction, which utilize physics:
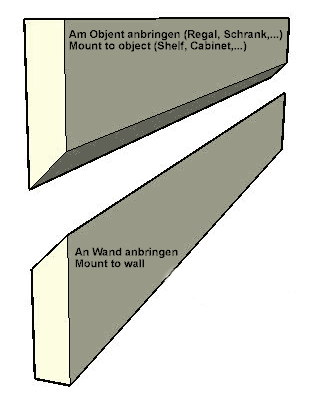
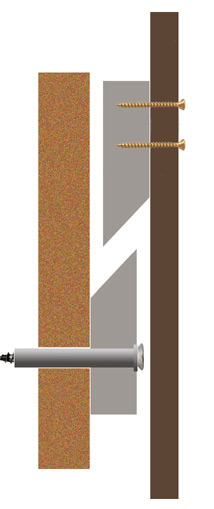
Due to the fact that the two cleats, ie the angled bars, wedge into one another, the whole guy is “bomb-proof”. The physics - more precisely, the gravitational force - is in this case the “TNT”. The heavier the object that hangs there, the tighter is the seat of the cleats. However, it can be resolved without much effort.
The only thing to note is that the heavier the object to be held, the more stable wood should be used for the cleats.
Buildup
Each of the three chambers should have such a cleat system. The main use of the chamber is: shoes. For this purpose, I measured the average height of a pair of shoes and set this as the distance between the cleat strips mounted on the wall:
30 cmI could calculate how many cleats I can bring to the wall. There were six, since I did not want to mount them all the way to the ground. There should be room for drinks crates or something different.
After that, I had the idea that there should be two types of shoe shelves with different widths:
- 28 cm
- 14 cm
Now it’s time to build these shelves:
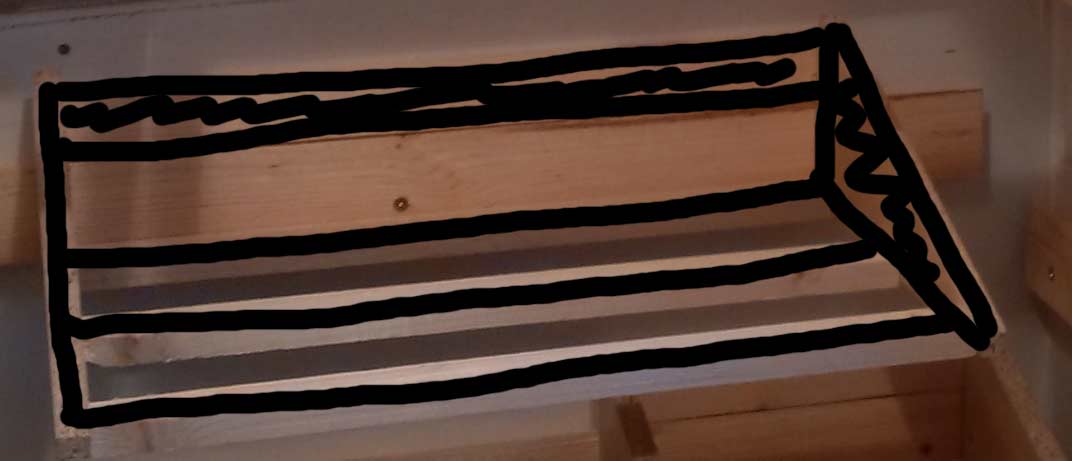
Thereto I needed per shelf:
- 3 timber beams
- 2 triangles (therefor I cut a rectangle diagonally) out of compressed wood
I then put them together to form a shelf and finished with a cleat. The result: About 10 shelves with the two different widths.
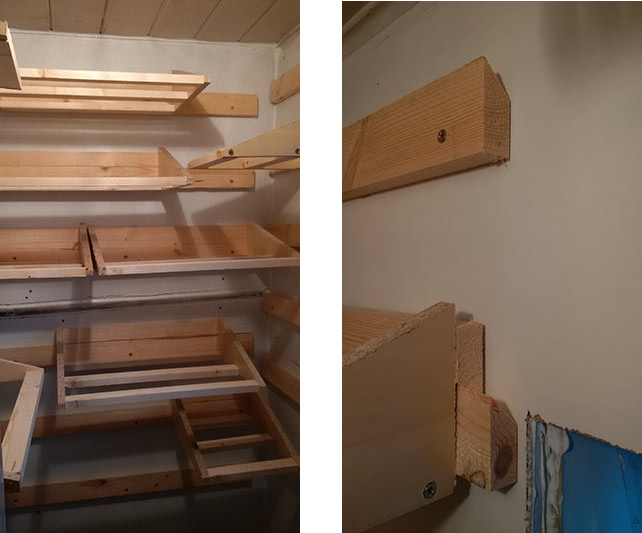
But this is not the end of the flagpole. There will be other cleat elements:
- Hooks
- Trays
- Clips
- …
In the lower area I will also create areas where drinks, crates and others will find place.
It tooks me 2 days of work - each about 4 hours. A nice side effect of the whole thing: It still smells of wood in the chamber even after weeks … gorgeous.
